Cinematography - My view on it
- Peter Kalnbach
- Aug 6, 2021
- 4 min read
Since my style is often regarded as cinematic by viewers I get a lot of questions about how to make a picture look like a movie scene. That’s why I decided to write this post.
First of all, I don’t see myself as a cinematographer or anything near to this. Cinematography is a real profession and needs a lot of skills and practice. I just approach every image I take and edit like a movie scene.
Furthermore, I don’t think that there is just one cinematic look. If you look at cinematic classics like Joker or Bladerunner and compare them to other masterpieces like No Country for old Men you literally will not find many similarities at first sight. Regardless, all involved cinematographers received a lot of credits for their respective work. To me it's not a big surprise that is impossible to go for the Bladerunner look in a movie playing in the countryside like No Country for old Men. There are no neon lights and less colors to work with. As you can see by these examples, cinematic images can’t just be taken in bigger cities like New York, Tokyo or like in my case Hamburg. Also, cinematic does not describe just one style or look. So don’t use this as an excuse for not achieving the look you were aiming for.
So what is it that makes an image regarded as cinematic by a broader audience instead? From my perspective there are mainly four points that do matter.
Storytelling
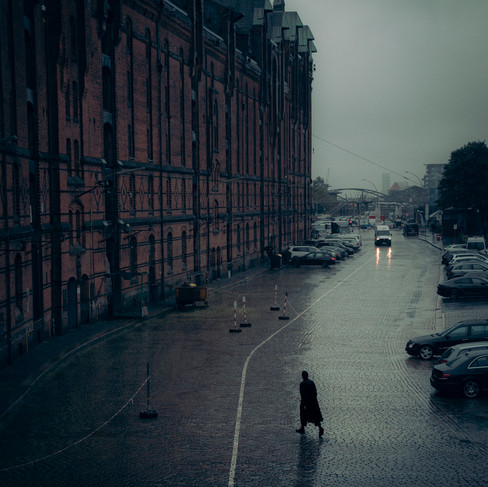
First of all, the whole scene you are going to capture should look like the setup of a movie. This means, it should tell a story to the viewer. This includes people in the frame, their expression or body language, the background, the framing and any distracting items possibly ruining the overall mood. It's pretty obvious that all of this can’t be achieved when just running around and press the shutter. Instead, you have to work out a scene. Look for the right elements, frame your shot and wait for the right person to enter the scene or action to take place. All elements combined tell the story of your image. And most important, don’t be satisfied with the first decent take you get. Always ask yourself is it the right, interesting person? Is the person placed perfectly in your scene? Does the body language or facial expression look interesting? All in all, is there an interesting story being told in this take? If the answer is no, wait for the next chance. Some of my most liked images on Instagram (street.nomads1605) were taken after waiting for quite a while or even after coming back to a location several times. The best scene most likely doesn’t look cinematic when a tourist with outdoor clothes and a backpack is the main subject. Except, you are going for an adventure scene or silhouette ;-)
Conditions
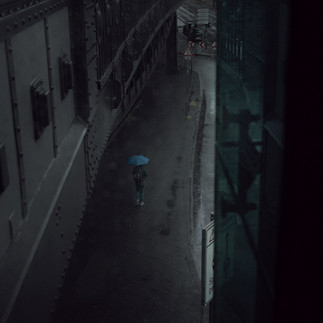
If you look closely at your favorite movie scenes you will most likely recognize that they are often taken in specific weather or light conditions like sunset, rain, fog or at night. Not many movies regarded as cinematic were taken in the midday sun. So, if possible, make sure that the time you visit a certain spot is just right. Look at the weather forecast or use apps like Photopills to see when the light hits right. The good think about this is, you can get away with more than just one shot from a scene. The same frame might look completely different when shot in rain or fog instead of in the rising or setting sun. This applies for you characters too. Or do you expect to find an umbrella when it´s not raining? Or a person wearing a coat and hat at 30 degrees? When you want to incorporate light in your shot (no matter if artificial light or sunlight) make sure to place yourself and your character at the right spot when pressing the shutter. As you might saw in movies characters are often lit up at just one side leaving the other side in shadows.
Composition
An image always looks the best when you use layers, pattern or frames in order to create depth and put the focus on the right scene or person. So look for windows to shoot through or use holes or railings as a frame in your shot. You also can blur out the foreground in order lead the viewer to the right subject in your frame or use leading lines instead. Another important decision to be made is the angle you take the shot in. The best way to get that cinematic look is often the landscape format. Since Instagram does not like landscape as much as the normal 4:5 crop, I often take a shot in both horizontal and vertical format and decide in post what looks best to me.
Color Grading
The final important thing that makes your images look more cinematic is color grading. No matter if you use Lightroom (like I do), Photoshop, Capture One or whatever other editing software, color grading gives your image the overall look. So think about what tones you wanna go for. Do you want to go for a more colder or warmer look. Are there already any prominent colors in the image you can work with? From my perspective, getting better in color grading needs two things: learning color theories (e.g. buy yourself a color wheel) and understand the several ways you can adjust colors in your editing software and how they work together. In Lightroom my main important tools are the RGB tone curves and the color grading wheels. Whitebalance and camera calibration are further tools. Since most editing softwares aren´t destructive don’t be afraid to play around and see how each of these tools effect your image. I often produce more than just one look and decide afterwards which one is my favorite. Another helpful lesson I learned is to not edit an image and publish it directly. It´s better to come back to an image after a while and look at it again. Sometimes, you see things you haven’t seen before.
I hope my thoughts on this help your photography to look more cinematic.


Comments